
See MailMerge Ext in action — simple steps to send your first personalized emails.
We know that sending personalized emails with unique attachments might sound complicated, but with MailMerge Ext it’s surprisingly easy. Here you’ll find clear illustrations and short guides showing exactly how to set up your Excel file, load it into Word, and send customized emails directly through Outlook — all in just a few clicks.
How to Activate
Download

After purchasing your license, download the latest version of MailMerge Ext directly from your account dashboard. The file comes in a compact installer, easy to store or share within your team.
Install
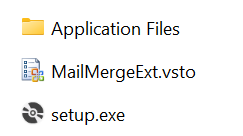
Run the downloaded installer and follow the simple on-screen steps. The setup takes just a few seconds and integrates seamlessly with Microsoft Word and Outlook.
Open
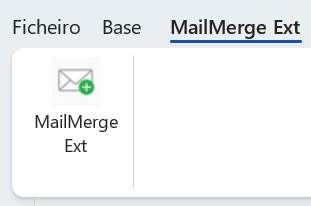
Launch Microsoft Word, and you’ll see a new “MailMerge Ext” tab in the ribbon. Click on it to access all the features and start setting up your mail merge.
Use
Create or open your Word template, connect it to your Excel file, and use MailMerge Ext to personalize subjects, recipients, and attachments. Then send your emails directly through Outlook with full tracking in your Sent Items.
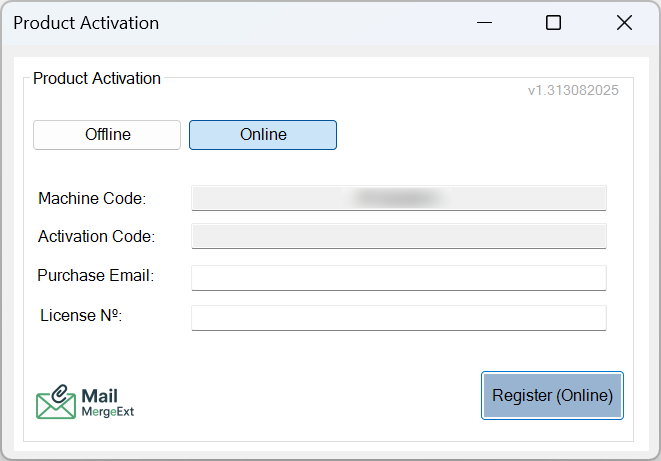
Activation
Copy the Machine Code
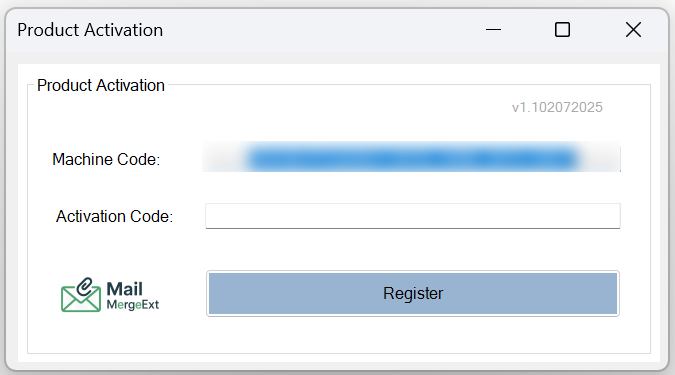
Open the MailMerge Ext dashboard on your computer. You’ll see a unique Machine Code displayed in the activation area. Copy this code — you’ll need it to generate your license key.
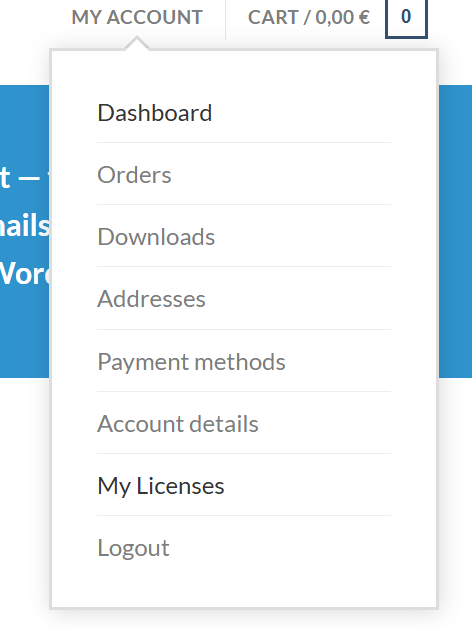
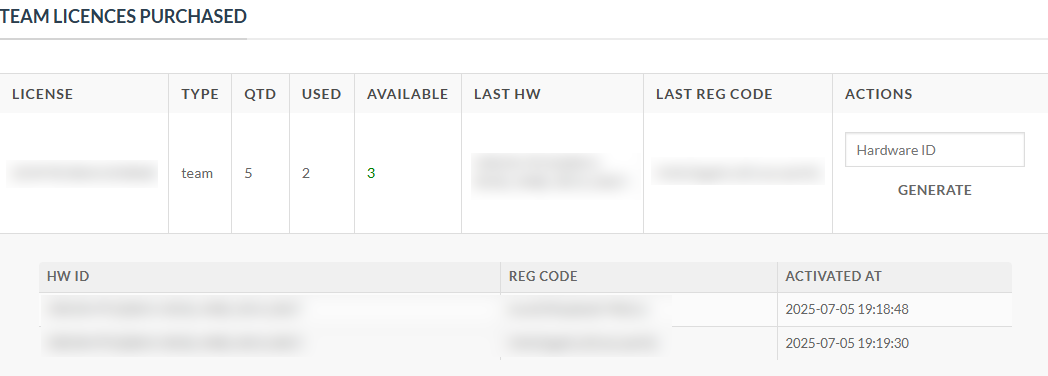
Open the Licenses Page
Log into your account on our website and go to “My Licenses” in your dashboard. This is where you can create and manage your activation codes linked to your purchases.
Past the Machine Code and Click Generate
Paste the Machine Code you copied from the app into the provided field on the licenses page. Then click “Generate” to create your unique activation code.
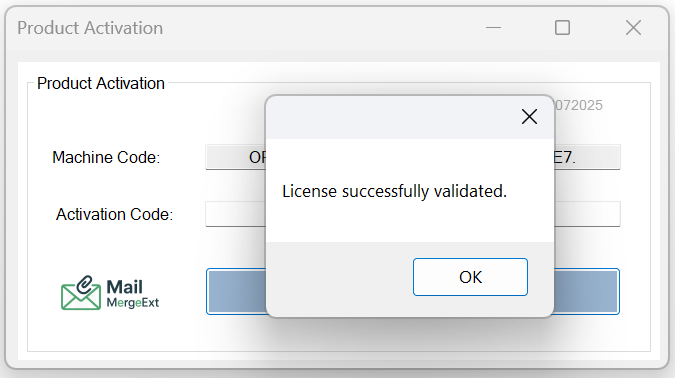
Past the Generated Registry Code
Return to the MailMerge Ext activation screen on your computer. Paste the generated Activation Code into the field and click “Register”. Your license will be validated instantly and ready to use.
Offline Activation
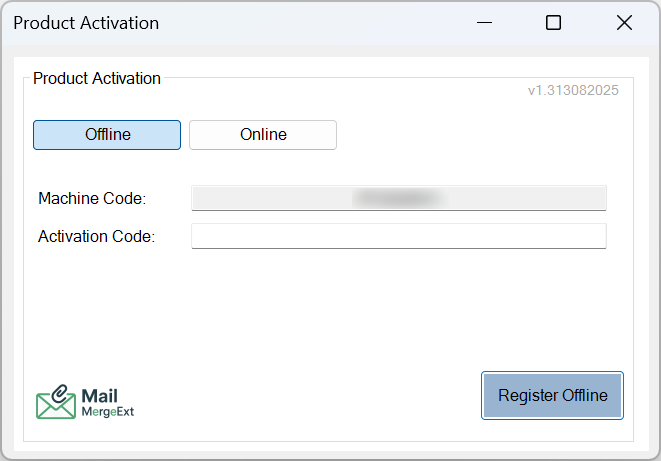
Online Activation
How to Send Messages
1 – Create the Excel Database
Field TO
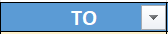
Create a column named “TO” in your Excel sheet. This will store the recipient email addresses. Each row must have a valid email.
Field CC

Optionally, create a “CC” column to send a copy to other recipients. Leave empty if not needed.
Field BCC

You can also add a “BCC” column if you want to blind copy someone. This field is optional and can be left blank.
Field Attachements


Create multiple columns in your Excel file like “Attachment1“, “Attachment2“, etc.
Each cell should contain only the filename with its extension (e.g. invoice.pdf).
MailMerge Ext will look for these files in your base folder and attach them to the corresponding email.
…
Field Custom


Add any extra columns for custom merge fields, like “Name” or “InvoiceNumber“. These will be replaced inside your Word template to personalize each message.
…
Pro TIP
Pro TIP 1
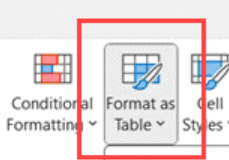
After creating your Excel sheet with all the necessary fields, format it as a Table (Insert > Table). This ensures that if you later add more columns or rows, they’re automatically included in the data range.
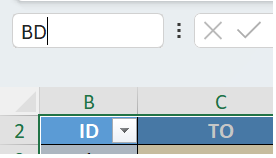
Pro TIP 2
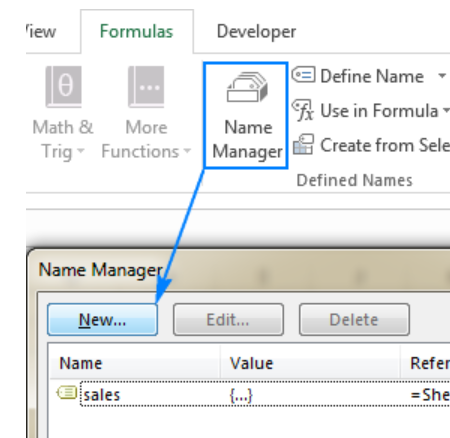
Select your entire table and give it a clear Name in the box next to the formula bar (like MailData). This makes linking your data source in Word easier and more reliable.
2 – Create the Word Template
Create the template by topic (clients, invoices, newsletters)
Start by preparing your Word document with the message tailored to your needs. Whether it’s for formal notices, client updates, internal memos, or any other purpose, organizing your templates by topic helps keep your communication clear and professional.
Configure document for Mail Merge and select recipients
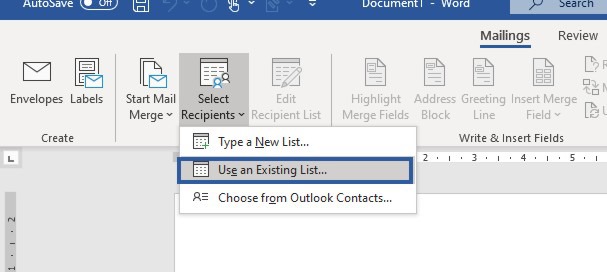
Go to Mailings > Select Recipients > Use an Existing List, and choose your Excel file. This links your Word template to your database so that it pulls the right data for each recipient.
Map each Excel field to your template

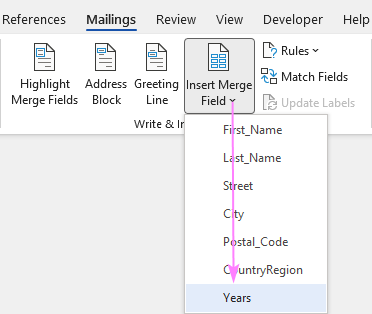
Place merge fields like «Name», «InvoiceNumber» or any custom field into your Word document. Each of these will automatically be replaced by data from your Excel sheet for each individual email.
3 – Open MailMerge Ext at word
Open your Word document
Launch Microsoft Word and open the document you’ve prepared as your mail merge template.
Go to the Mailings tab
Click on the “Mailings” tab in the Word ribbon. This is where all your mail merge tools are located.
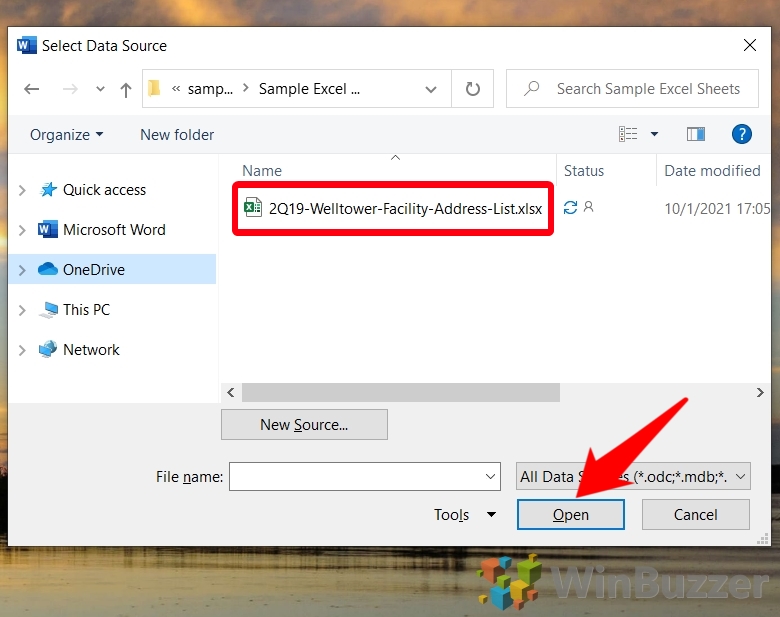
Start Mail Merge & select data source

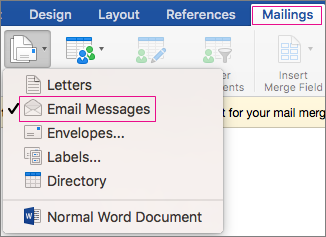
Click “Start Mail Merge”, then choose “E-Mail Messages” and select your Excel file as the data source. This connects your template to your recipient list.
Open MailMerge Ext
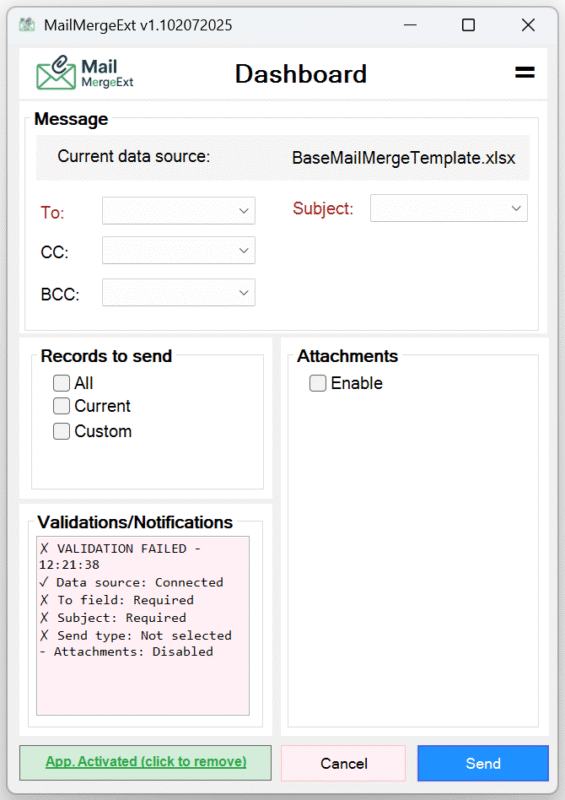
Finally, click on the “MailMerge Ext” tab in the ribbon with the name“MailMerge Ext”. This opens the add-in so you can configure your fields, validate your data, and prepare to send personalized emails.
4 – SEND
Without Attachments
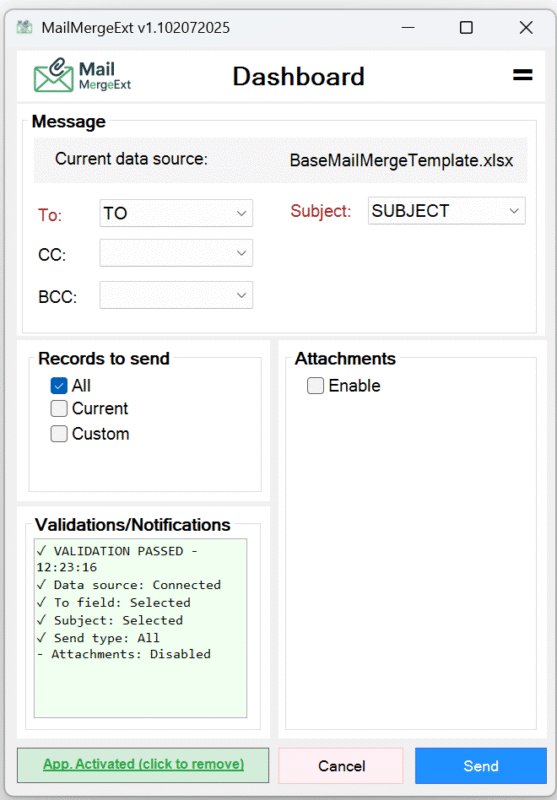
To send emails without attachments, just leave the “Enable” box in the Attachments section unchecked. Make sure you have at least the To field, Subject, and Records to send selected. When everything is correctly set up, the validation area will turn green — that means you’re ready to go.
With Attachments
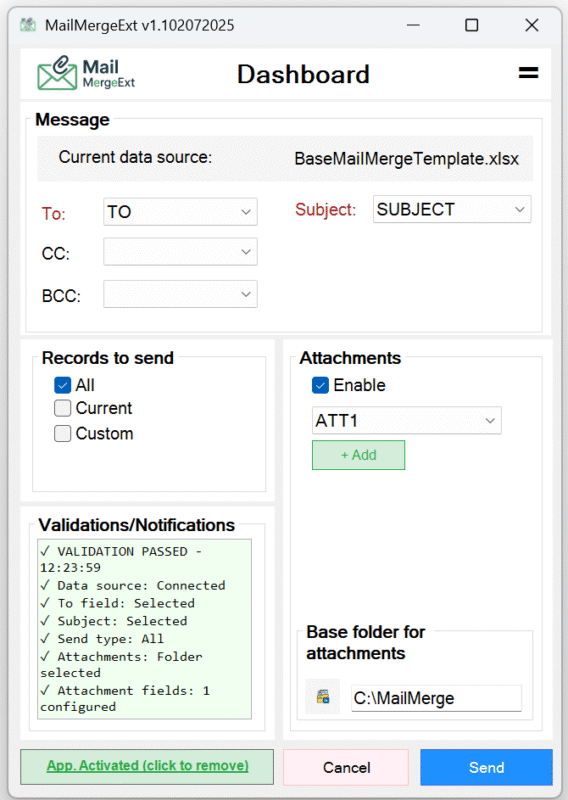
To send emails with attachments, check the “Enable” box in the Attachments section. You must have at least one Attachment column configured in your Excel file and specify the base folder where the files are stored. Along with the required To, Subject, and Records to send, the validation area will turn green when everything is set — then you’re ready to go.
Send your Messages
Once the validation area is green, simply click the “Send” button. MailMerge Ext will generate each personalized email and place it in your Outlook Outbox. From there, Outlook handles sending and tracking as usual. Each message* will be moved to your Sent Items after it’s dispatched, letting you keep full control and history within your own email account.
*Tip: If you want to monitor delivery or add follow-up flags, you can do it directly in Outlook after sending.